
Ok, so the jeep is on the lift. It appears that a bubba swapped in a Dana 44 front axle from a wagoneer or Cherokee. They apparently ground the diff case mounting pad about ten degrees or more in order to aim the pinion up toward the front output. This is usually done for ground clearance at the pinion yoke. It's an easy thing to do to gain a lot of clearance. The hard part is to cut and turn the inner "c"s of the knuckles to restore proper caster. This was never done. The driver side "c" was booger-welded, but I don't know why. The width of the axle seems to be stock.
The caster was approximately zero degrees. Adding to the problem was loose wheel bearings. I mean like move the wheel up and down a half inch or more kind of loose. It was probably because bubba had broken the locking pins off of the spindle nuts and they were free to loosen themselves.
I have stripped the outer ends of the axle and will be grinding out the welds and turning the "c"s to get the proper angle. I will be replacing the ball joints, wheel bearings, spindle bearings, one outer spud shaft, and the axle u-joints since it is all apart and needs it.
The differential has an Easton Detroit Locker and 4:56 gears which are in great shape, so they will be untouched.
The quadratrac transfer case has not been converted to part-time use. It should not have been used with locking hubs, but is okay to use if they stay locked all the time. After the steering is corrected successfully we will most likely be installing a part-time kit and new chain and seals on the transfer case. That will take care of the drive problem with hubs unlocked and it will no longer really be "quadratrac".
The transmission shifting is a very loose thing at the moment. The column shift linkage to the turbo 400 is way past worn out. There is at least a quarter inch of play at every bushing, resulting in a lever so loose that when you are in drive you can move the indicator anywhere from N to 1 and still not change the gear! We will be installing a floor mounted cable operated shifter to correct this. The cable has the added advantage of not being susceptible to frame and engine twist affecting shifter position. With the Holley carb on a Clifford 6equals8 manifold the vacuum signal is not stock. The vacuum modulator on the transmission will be changed to an adjustable one to correct the shifting behavior.
It's crazy that all Keith got with the jeep was the title and keys. No paperwork whatsoever for any mods. I have Manila folders full of info for every vehicle I own, and if I ever sell one they will be given to the new owner. Oh well, that's it for now.

Customized help
-
-
Got any pictures? Sounds interesting. My guess is the previous owner ran out of money doing the other mods and stopped when it got to the front axle.
-
Hole. Lee. Crap!!! Sounds like you have your hands full on that one! Let me know if you want/need any help. I'm usually home by 3:30 after work... except for the next 3 Wednesdays I have to work late. I don't think I gave you my cell # last time (302) 750-033eight. Call or text me if ya do. I can follow instructions and turn a wrench with the best of 'em!

-
real glad u had time to look at this 4 him. Its pretty much what i had guessed was wrong. Im betting the previous ownern had the money but took it too the wrong shop.
-
Got the knuckles off. The huge weld on the driver side was like Swiss cheese. I don't even know how to get such a porous weld. The passenger side was just one bead, came off easier. When the new ball joints arrive I can mock it up, make it correct, tack it in, recheck, check again, and weld it solid. Might give kuntryboy a call when I need to move the axle around later this week, thanks for offering.
-
Got the knuckles off. The huge weld on the driver side was like Swiss cheese. I don't even know how to get such a porous weld.
I can show you if you really want to know... :confused:
I'd like to see it as well. Let me know when you're doing it and I will try to get over there.
Sent from my SCH-I545 using Tapatalk
-
Alignment in progress

-
Shouldn't you do that with the vehicle weight on the axle? Or is just when setting the pinion angle?
Sent from my SCH-I545 using Tapatalk
-
That would be the pinion angle. I took multiple measurements before doing anything, including measuring the angle of the pinion to the ground with vehicle weight on it. That way I knew what the caster angle is relative to the gasket surface of the differential. From that point it doesn't matter where the axle is as long as the relationship between the gasket surface and the caster is correct. The thing was already set up for pinion angle, and it is pretty much correct for the cv front shaft they installed. The camber gets adjusted next with the new ball joints installed. I will be looking for the spindle mounting surface to be 90 degrees to the angle of the axle tube. I'm still not 100 percent certain about the origin of the outer knuckles. Some manufacturers add some camber and some don't. These were too crooked to begin with to really tell at that time. They don't really anticipate the axle flexing under weight for any of these settings. The axle tube itself is 1/2" thick 2-3/4" material, very very stout!
In my real job I am a carpenter, this measuring and squaring stuff is very similar in many ways as crazy as that may seem. -
I have Chevy flat top knuckles on mine. It gave me a nice high steering set up
Sent from my SCH-I545 using Tapatalk
-
That is a cool deal, minimum bump steer. These are most likely wagoneer items, but the casting numbers don't show up on any charts I've found yet.
-
Just as an update Andy has done a phenomenal job locating the issues with the front axle
There's more work to be done but I'm sure he will post more info on the setup that was supposed to be done right for the cj7 -
Yesterday was a good day for the red CJ7. I was recently able to identify the outer knuckles as flat-top Chevy knuckles. As such, they are manufactured with Chevy's idea of the proper camber, 1-1/2 degrees positive. Slimer, if you are running these you should be able to notice that the front wheels are angled out at the top when viewed in line with the rear wheels.
The big manufacturers use many different angles for this. It probably doesn't matter what that angle is as long as the two sides are the same, within reason.
The Spicer brand ball joints I got first were so loose I could move them around with one finger. I didn't like that so I got a set of Alloy USA joints. They came in Friday afternoon so I was ready to proceed. I pressed them into the Chevy outer and hung them on the inner "c"s. I used my trusty "T" square to set the angle of the outer face to 1-1/2 degrees positive in relation to three feet of the axle tube. This makes the inner "c" angle correct.
The passenger side was very straightforward, was almost correct from the start. It had never been removed until I removed it. The axle tube and inner "c" were cleaned to ready-to-weld condition and they fit together hammer tight. Once this side was correct in every way I tacked it in place. I then moved to the driver side.
The driver side was previously welded inside and out. It was crooked to the eye and usually they are only welded on the outside. It was also on the tube too far and the inner axle yoke had worn a groove into the axle tube to clearance itself. I bet that sounded good! Anyway, when I removed that side I could see why it was welded inside and out. For whatever reason they had ground the axle tube outside diameter considerably, and the "c" was not tight on there at all.
I made a bunch of tapered steel shims and shimmed the thing tight, centered on the tube and using a jig on the axle tube I set it exactly the same as the other side and tack welded it in place. It should have been identical to the other side.
I then put the knuckle on to check the angle with the actual part in place, and it was out by 5/32 over three feet compared to the other side. So I ground off the top tack welds and was ready to adjust it. Then I noticed that there was a raised portion on the corner of the knuckle face that someone had hammered on. I filed it flat and what do you know, it was correct after all. This means that it reads correct with two different measuring techniques, out less than 1/32 over three feet. I'm good with that so I tacked it up, checked it again, and called it good. I then used my engine hoist to move it to my axle stand to go in the other garage to be tig welded. That was enough for a day, I am going to weld it today.
The axle used a wagoneer differential, Chevy flat top knuckles, Chevy calipers, ford hubs and rotors, and ford or Chevy stub shafts. Makes for fun parts ordering, but it's the way it's done if you do the wagoneer axle swap and want the 5x5.5 bolt pattern.
I also worked out some wiring gremlins. They had pinched the wire to the wiper washer way up under the dash, apparently causing a short when the washer button was pushed. So instead of finding that they had run wires here and there to feed stuff that was probably affected. I pared it down to pretty much stock harness, and cleaned up the routing of the wires so you can now look up under there and tell what is what, and you can get your hands in there without pulling wires loose accidentally.
The exhaust was laying real low on sitting agains the transmission mount and had rubbed a line on the side of the rear shock. It also stopped short by a half a foot or more of coming out from under the body. Parts are on the way to re do that, and the center section will be easily removable to simplify future drivetrain work. -
Also, Moog makes adjustable / off set ball joints that can a a few degrees where needed.
Sent from my XT1575 using Tapatalk
-
Thanks. I'm trying to avoid that, but it is good that they're available. The welding went well and the axle is back on its springs. The angle didn't change a bit with the final welds!
-
Thanks. I'm trying to avoid that, but it is good that they're available. The welding went well and the axle is back on its springs. The angle didn't change a bit with the final welds! overtime
No perspective OT for me this week so if you need a hand or just want some company shoot me a message or call. I'll be home by 3:30 each day.
-
I u-bolted the axle back on the springs. Then I put the outer knuckles on and adjusted the ball joints while torquing them down to spec. Then I put the spindles in with 1-1/2 degree camber shims to eliminate the Chevy camber. I stuck the hubs and rotors on to check the final alignment. I think they are dead on and this thing should handle really nice. After AOAA I will finish reassembling it, and it will soon be ready to roll.
In case anyone cares, I got some of the nicest u-bolts I've ever seen from Barnes Four wheel drive. These things are 5/8" and are made to machinelike precision! The radius is precision and the legs are parallel all the way to the end. The price was very reasonable also.

-
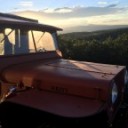
The jeep is now driveable! I got it all buttoned up and took it for a ride yesterday, what a difference! Here are a few pics.

This is why Keith bough the jeep, it looks good!
Here are the views of the camber.

-
Check out the contact pattern as shown here by the dust on the tires from rolling into the garage, pretty symmetrical.


-
Don't worry, we're changing out the flex brake lines. I would like to add that my test drive was in regular quadratrac mode with hubs locked in. The wandering issue is gone and it doesn't pull when braking. Heck, I even centered up the steering wheel! After Keith checks it out today I will ask him if he wants me to put the steering stabilizer back in.
I also dropped the transmission pan and pulled the valve body. The shifter shaft was chewed up and the seal was shot, the o-ring seal on the kick down was leaking, the dipstick tube was leaking, the governor gasket was leaking, the modulator was leaking, and the rubber pan gasket sealed with silicone was leaking.
The valve body itself was good all except for one burr where it had been dropped. The very thin paper gasket for it was blown out at that point. And the o-ring on the accumulator was beat.
I replaced all of those items and we are good to go. The transmission shifts properly now through all gears and is much less mushy. The floor shifter we added tightened the linkage up also, making the transmission an entirely different experience.
I also ran a new 2-1/4" exhaust system. It is hanging from hangers and not laying on the crossmember or rubbing against the shock. Way nicer!
The engine got some love too. It turns out to be a 4.0 HO motor from a 1992 model. This explains the electric fan and radiator clearance issue. This motor is slightly longer than the 258, if that is possible. I removed the leaky valve cover and a couple of broken bolts. I replaced it with an awesome looking new design high dollar reusable gasket that is made of blue rubber with raised o-ring type sealing surface and spacers and stiffeners molded in. If this only saves one time of hanging over the engine trying to scrape crusty stuck on cork from the head without getting any pieces in the engine then it is worth it for that alone! It is not leaking anymore.
I also replaced the parking brake cables to the rear, one of them had been eaten by the tire. I used a universal set and tightened it all up against the frame rail to allow more room for the exhaust.
Participate now!
Don’t have an account yet? Register yourself now and be a part of our community!