
There's a review on youtube that of the 10th Anniv Ed Rubi that was obviously done by some fat oaf who has never sat in a Jeep in his life. It was almost like they put him in the Jeep, pulled off the blindfold and started filming. "And we have the power window switches.....over here...of course...that's uhhh because the doors come off...obviously."
Posts by tedsbumper
-
-
Wife bought me something sim to this one years ago and I still use it when I go camping...That's a cot, not a hammock. Jesus, they'll let anyone into those New Castle County stations.
-

Trey and I (unless he switched) are running Clark Hammocks. It works well but most of the time I tend to just use my Eagles Nest hammocks since they are simpler.Clark Jungle Hammock...the ONLY camping hammock you will ever need for all uses. Yes others are simpler at times, but no competitor on the market will do what the Clark does nor will they protect you in as many climates as the Clark. One common theme on these camping hammock forums is "It's not a Clark, but if you modify this, this and this and add this, it will perform better." and the other common theme is, "I shoulda just ponied up the extra cash and gotten the Clark." Clarks need no mods IMO and they outperform.
Some finer points to illustrate my statement:
-Single layer mosquito-proof material...mozzies can bite through a single layer of almost any material...even denim; not this stuff.
-No-see-um proof netting
-6 large pockets underneath you (3 on each side) into which you can stuff your clothing to insulate yourself from underneath.
-All in one piece...screen and rain cover attached to the hammock itself and rain-fly attached to the rigging
-Clark sells sealant and water rings (for the ropes) I have both and have never used either and I have slept through some DOWNPOURS and stayed dry.
-Packs up to the size of a football in an attached storage bag...attached...you will never lose the sack
-You can add an insulated lower shell that velcros right to the hammock for use in extreme cold environments
-If you don't tie the rain fly out, it will velcro to itself and form an extra weather-proof layer around the hammock.I have compared mine to a Henessy that a buddy had once and there was no comparison. I'll put it to you like this, if you wanted to drive the Moab Trail, you could get a Nissan Pathfinder, modify the shit out of it and you might make it. Or you could just go get a Rubicon JK and be pretty much assured of success.
I have two now, both the North American model. One is my girlfriend's. I take them backpacking, bicycling, motorcycle trips and frankly, I find them much more comfortable than any tent with an air mattress I've ever used. The two I have use different size rain flies. I recommend the larger size fly.
And the biggest difference to me, customer service. They sell direct. When I called to order mine, the owner of the company answered the phone and completed the sale. He was genuinely interested in how I found out about their product and what made me choose them. Very rare in today's economy.
-
I'll be out in the AM...point crossing. Brink Jack.
-
That's it, either a great condition factory soft top with ALL hardware or a black hardtop.
-
What top you got for that thing?
-
In May of this year, my girlfriend and I decided to take a trip on Skyline Drive and The Blue Ridge Parkway on motorcycles; camping along the way. Not wanting to fight DC morning rush hour traffic on bikes, we trailered them to Front Royal, Va. Once there, we loaded up all our gear for the next 5 days and hit the road.

The weather forecast was only calling for chances of scattered storms later in the week so we set off feeling confident the weather would totally change and ruin our vacation.
The going was slow as my girlfriend wasn't very confident in the twisties so we weren't putting down near the mileage I had hoped.
The first night, we camped in this awesome secluded National Forrest Service campground called Cave Mountain Lake.

They had two streams coming off the mountain, going right through the campground and feeding into the lake. Our campsite had a stream running between the parking space and the camping area with a footbridge connecting the two. To save on space and weight, we carried Clark Jungle Hammocks instead of a tent and sleeping bags. So we hung our hammocks right next to the creek and the sound of the running water lulled me off to a deep sleep interspersed with pee trips.
The Blue Ridge Parkway was built after Skyline Drive and serves as a connector between Shenandoah NP and Great Smoky Mountains NP. Unlike Skyline, the BRP is flanked on both sides by private land so the scenery is quite different. The speed limit is higher and there are way fewer vehicles. The riding is awesome!

When we reached our campground, we found that the Obamanation and their 'sequestration' had shut down our campground without making notifications.

We stayed in a hotel in Boone, NC that night. The next day, the weather was getting so bad that we decided to turn back. We camped again the third night and got up the next morning to pouring rain. We had to pack and get dressed in the rain. Unlike car camping, there is no thought of getting packed up and jumping in your dry car. Instead, you have the thought of riding in the rain looming over you. So we got started and headed for Skyline Dr. Then the fog hit. I have never driven a seatbelt and airbag equipped car through shit that thick. On a bike, it was madness. We missed the entrance sign for Skyline...even though it was 8 feet away. At one point, I almost rear-ended a white SUV that was, unbeknownst to me, only ten feet ahead. They were not using any lights so I suddenly had four round tail lights illuminate immediately in front of me. In fact, most asshats on Skyline that day were using no lights at all.
We were going to camp in SNP that night, but the forecast just called for more and more rain so we just soldiered on to Front Royal and came home a day early.
In spite of the weather, it was a magnificent ride and I'd suggest any of you outdoorsy types borrow a bike and try it sometime.
There's a great video on my FB page for any of you that are friends with me on there. If not and you'd still like to see it, just friends request me. Hell, all jeepers are my friends...except for Pennsyltardians, Jersey A-holes, anyone from NCC, Dr J, anybody who thinks they're a Jeeper because they drive an XJ with a CB, Jeepers with small dogs or cats, mall crawlers, hard-core crawlers, any jeeper who can't put away a pound of scrapple for a snack, anyone using anything from Rusty's Offroad and Andrew Marino.
https://www.facebook.com/video/video.php?v=10151672063343536¬if_t=video_processed
Enjoy!
-
I usually go over the Navy crossing and head north. I like to c@#k-block the last space before the bipedal sucker's beach.
-
I'll be out there...Navy crossing. Stop by...just don't bring anybody who gets offended easily.
-
Both Haas' butcher shop on Hazletville and Whit Bros in Camden.
-
Some ideas we use is Italian dressing. Stab the steak to out holes in it then put it in a zip lock bag. Pour italian dressing in it and letit sit for 8 hours in the fridge while you are at work. No A1 needed...
OH DEAR LORD! First off, mail your man card back in because you don't deserve it. A cow gave it's beautiful meat for your belly and you destroy it like that. You disgust me more than car insurance commercials. Poking holes in steak causes them to dry out on the grill. Period.
I don't BBQ, I grill. BBQing is a skill that I haven't mastered yet, but I'll put my steak up against Morton's, Ruth's Chris, Sullivans, whoever any day. I don't just grill my steak, I'll cook the whole meal including sides on it. But here's a simple way to not ass up cow.
1. Get good quality steak with lots of marbling. FAT = FLAVOR
2. Let the steak come up to room temp before grilling. On thicker steaks, this is important to get a warm, pink middle...everybody prefers a warm, pink middle over something hot only on the surface and cold and frigid inside.
3. When I say thicker steaks, I have the butcher cut my NY strip steaks 2" thick. It takes skill, but yes you can grill some absolutely slamming thick NY strip steaks. The only prep work you may need to do is cutting the fat...not trimming. On thinner steaks, a large fat band around the edge will curl up under heat and cause the steak to warp. Leave it on there, but make little stress relief cuts every one inch.
4. Just before grilling, and I mean just before, dip your steaks in a 50/50 mixture of veg oil and melted UNSALTED butter. Let the excess drain off, DO NOT PAT DRY.
5. Slap them on a cutting board and coat to taste with fresh cracked peppercorns and kosher salt. Do not get all mad scientist and start throwing everything in the spice rack on them. Pepper and salt. Use your palm to press it into the steak.
6. Slap them on the grill. 2.5-3 minutes as is and then rotate them 45 degrees for another 2.5-3 minutes. This gives those lovely cross-hatch marks like real deal steak joints and it helps ensure even cooking.
7. After getting a nice browning/char on the first side, flip them over. FLIP MEAT ONCE AND ONLY ONCE! You're not filming a GD porno here; two positions will get it done. 2.5-3 minutes and rotate and another 2.5-3 minutes.
8. Now, on 1" or thinner steaks, this will be enough. GET IT OFF THE GRILL. But on thicker steaks, you will want to continue cooking the steak until the center is done to your liking. That's why I use a big charcoal grill. I use a space for direct cooking (high heat) and I have an area away from the coals to cook other items and finish off my steaks. Most restaurants will "mark" your steak on a gas grill and then cook it in an oven or broiler.
9. Learn your temps for steak. Learn the touch method for checking your steak...you'll look badass at cookouts. I use a meat thermometer...as do a lot of chefs. Touch method is cool, but I don't want to screw up my dinner. It also can tell you if one end is colder than the other.
10. Let the steak rest for 5 minutes before serving. Do not pull it off the grill and start cutting into it. It will allow the juices to permeate back into the outer areas of meat and the result is a juicier slab of beef. Also keep in mind that the meat will rise in temperature 5 degrees after removing it from the grill.
11. Don't overcomplicate this stuff. 10-12 minutes will grill most steaks to perfection.
A side note about steak. Men eat their meat pink. It's what we do. Too many people out there are grilling steak with the same amount of care that Stevie Wonder puts into choosing paint colors. Stop it. And draw a line in the sand and stand behind your craftsmanship with pride. When somebody says, "Ewww I hate pink meat. It's disgusting. I want mine well done." offer them a hot dog or a burger. DO NOT RUIN YOUR FOOD TO APPEASE THEM! You wouldn't turn off your AC in July and crank the heat up if they asked you to. You would tell them to take their weird ass to a hotel. If they don't like it, they can leave. At a cookout once, my brother-in-law asked for me to cook his steak well done. In front of all the guests, including his wife and mother-in-law, I asked him if he had a mangina. I told him to pull down his pants and show it to me and I'd cook his steak well done. I told him if he had a penis, then he was going to eat his steak like a man or get no steak at all. He took it med-rare and his mother-in-law had to finish it for him. I never liked the guy anyway.
Now on to charcoal. I use Wal-Mart brand charcoal. The bricks are bigger and it gets hot...and I mean hot. And they burn longer. You want searing radiant heat to grill the steaks quickly. Before it broke, the thermometer on my Weber used to go all the way around the dial and start back up from zero. 1000-1200 degrees really gets the job done. Take that, you propane grilling little girls. Hank Hill has nothing on charcoal. Wal-Mart charcoal used to be sold in big ass bags for like 5 bucks and they were covered in advertising showing their bigger bricks. Now they are in smaller, plain bags, but the bricks are still big. I think they scaled back because people were catching on and it was taking a chunk out of Kingsford's sales.
Go get some good steak and practice around with it. Pretty soon, you'll be the cookout king and everyone will want you at their summer party in spite of your over-intoxication and your repeated attempts to get granny to do body shots. -
Seriously though, great write-up. I like the idea of the detachable rod holders. How far back are they from the tailgate? Can you still open it w/o hitting the rods?You can just get the tailgate open far enough to get the window to swing up. I was able to get two mountain bikes in and out with it mounted. If you left off two or three holders from the right bank and moved them over to the left down the side, you could get the door all the way open.
-

Well.... bob and I went out today and caught a handful of croakers and kingfish. Bob took the win with a spider crab.... go figure.Where did you go?
-
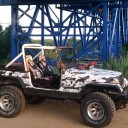
Welcome to Trey's Back Yard DIY! Today, we're going to show you an inexpensive way to convert your standard cargo rack into a fish slayin', rod holdin', head turnin' hunk of s#*t hanging off the back of your Jeep.
I decided to build my own AFTER I decided to purchase my own and found out they cost $400 for the ones designed to also hold a cooler. Due to my badass A to Z Fab front bumper, I cannot bolt a rack on the front of the Jeep nor do I really feel like driving down the highway trying to aim at Pennsyltardians through an antenna array.
So my options were to build something to hold the rods flat on my roof rack or figure out my own way to hitch mount them.
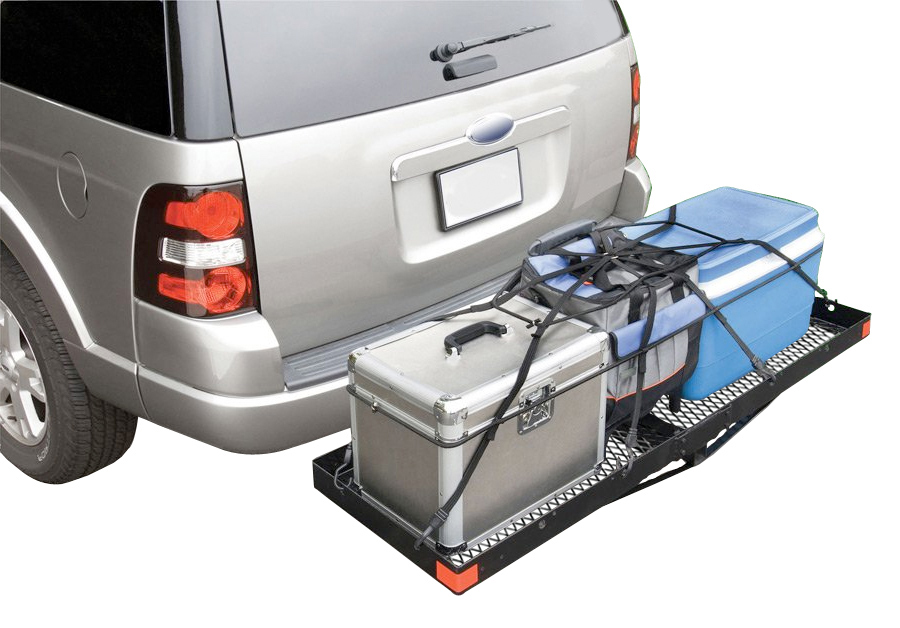
Let's get started. You'll need one of those hitch-mounted cargo racks. You should already have one laying round your garage getting ready to fall on easily damaged objects like motorcycle fenders or bare feet. If not, you can usually pick one up for cheap on DeJA when a member gets caught fooling around and suddenly finds themselves in need of cash for a deposit on an apartment. (Thank you, Vicky, for all that you've done for this club.)
This is the one I used:
Now we have to get the rod tubes mounted to this. I've seen guys bolt them directly to the rack, but this becomes a PITA when you need your rack sans rod holders. You end up with a bunch of loose parts hiding out in your garage lost forever.
So I decided to mount my holders to a sturdy piece of lumber that could easily be taken off by removing a couple bolts. I used 2X6 pressure treated wood that I cut into two 28" pieces.
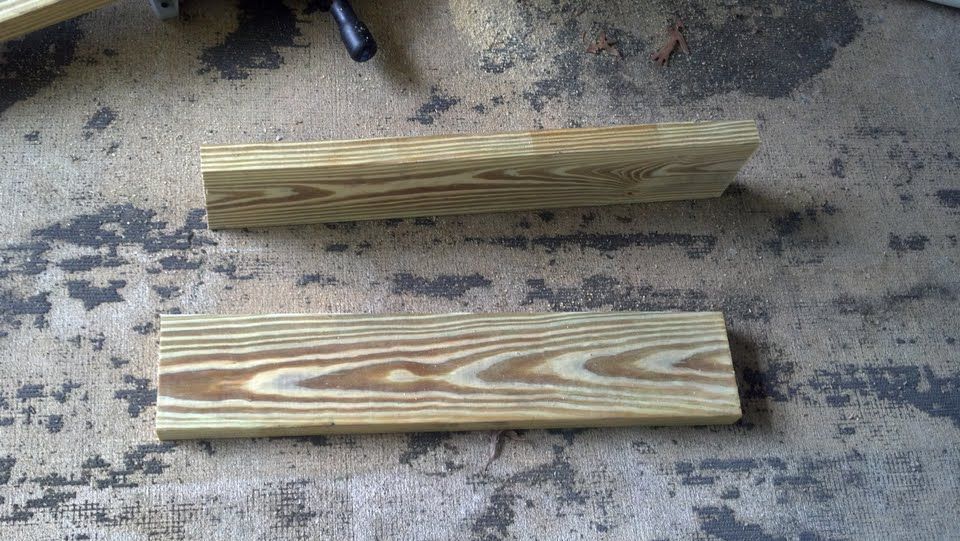
You may have noticed my porch floor looks like digital flectar urban camo. I ripped up the green 'no-mow' fake grass carpeting that was on my back porch and now I found a floor coating that looks even shittier than fake grass. Why the back porch for this project? The garage had a heat factor that brought up mental images of taking a nap wrapped up in an elephant's scrotal sack...and my porch has a ceiling fan.
Next I began to measure and mark the boards for the holes I needed to drill.
Now let's take a trip down the side track and have a little shop talk. I know a lot of you out there are limited by square footage in your man-cave or have plenty of space in your garage, but shortly after moving in, filled that space to the brim with tires, bumpers, and broken dreams of a custom crawler. Whatever your reasons, you may find yourself in need of a work bench that can pull double duty. That's why this week's tech tip focuses on the Craftsman 32000 series Heavy Duty, Slate Top, Half Moon Work Table:
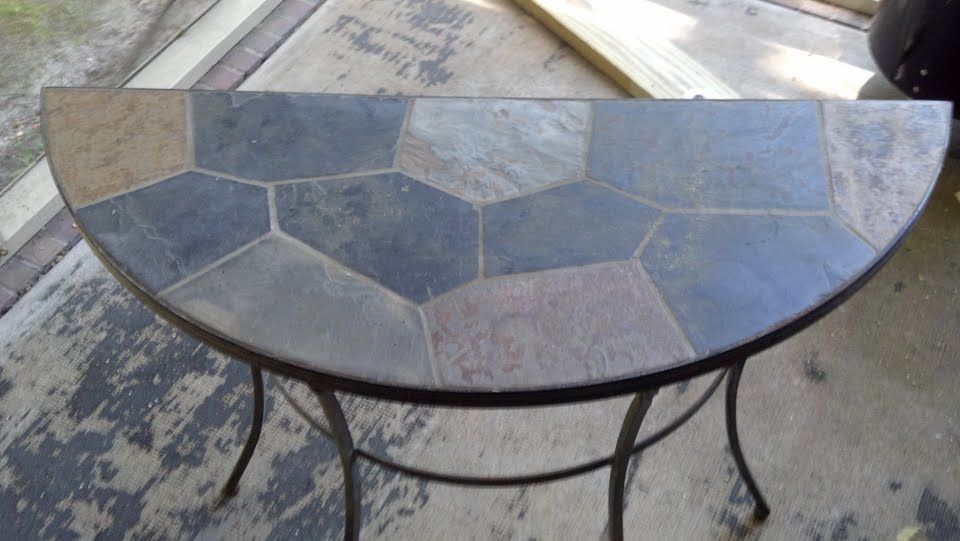
It's sturdy, compact and it easily performs roles as both a handyman's bench and a stylish side table perfect for a condiment area for cookouts or a place to snort cocaine. Pick one up today. You can find them at most hardware stores and Pier 1 Imports.
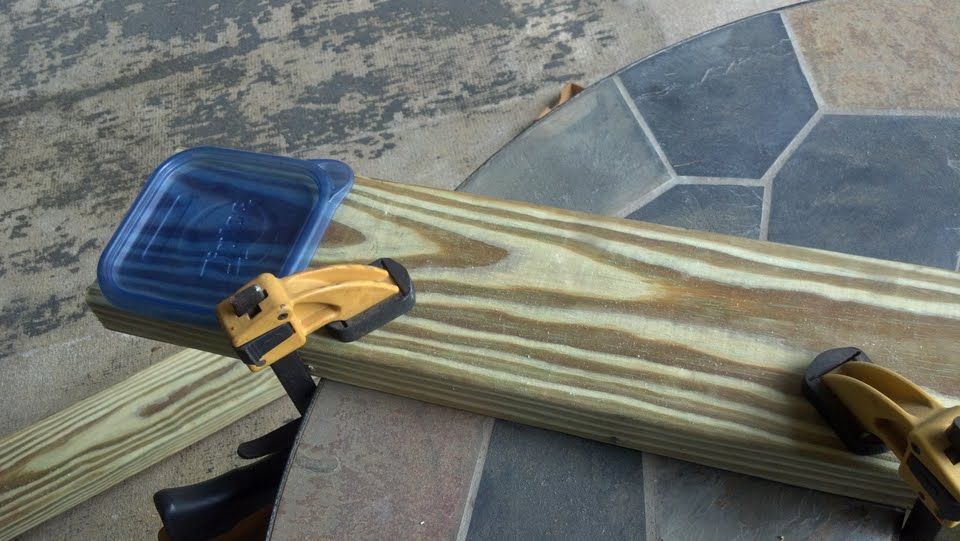
Next I used a lid from a candle jar to trace a pattern to round the edges of the boards:
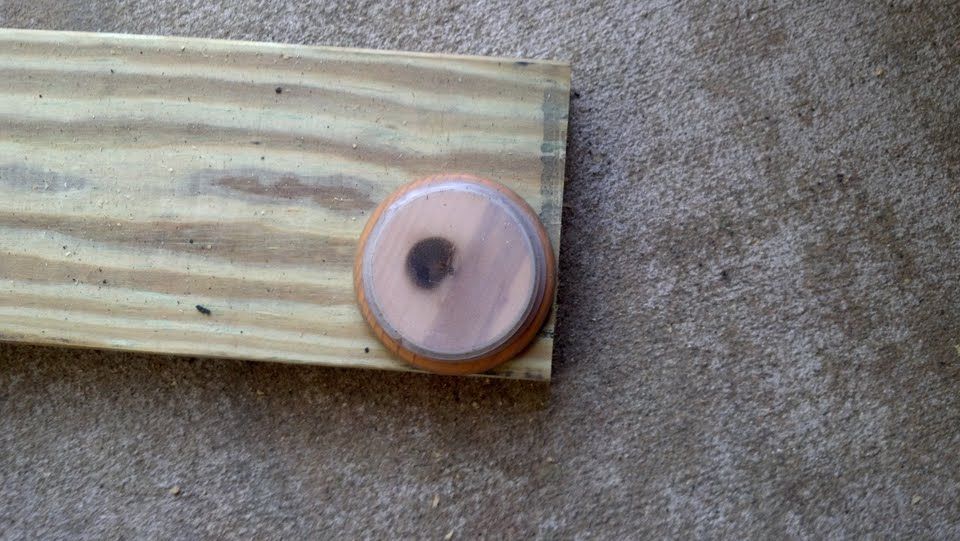
Why did I use a candle lid? Seriously? You've read this far and you have to ask?
Next I cut down some 1 1/2" PVC pipe into 12" and 18" sections. I mounted them to the boards with metal pipe straps and then I mounted the boards to the cargo rack.
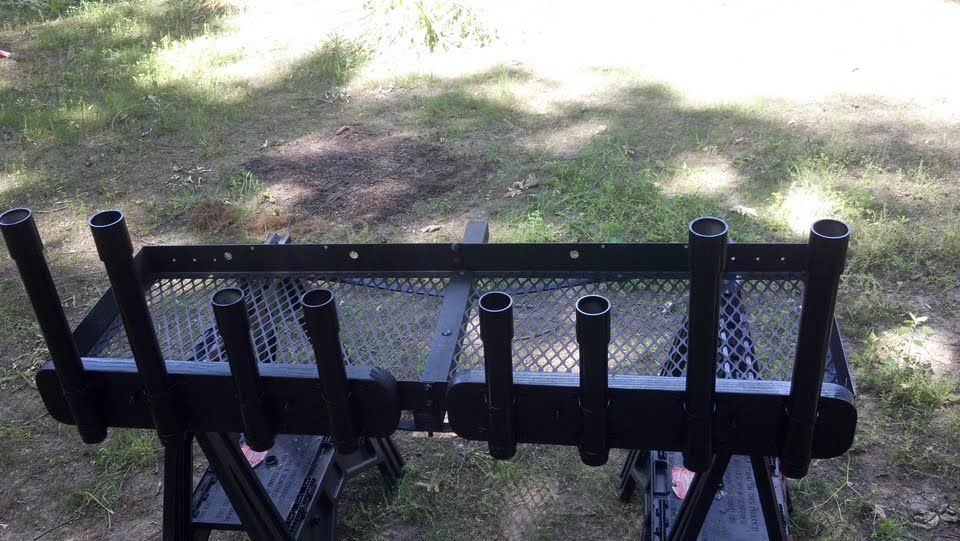
A little rattle-can paint job, and we're ready to go fishing! Some of my rods are big ol' 'envy my penis' 12 footers and the handle would hang too low and possibly drag on the ground if I hit a big enough dip so that's the reason for the 18" tubes.
Thanks for joining us here at Trey's Back Yard DIY. See ya next time!
-
Carl Troubetaris? The retarded UPS homo? Nope, never heard of him.
-
I'm one. I'm also neighbors with Franny George aka Little Bus from your station.
-
Is it for sale?Sure. Everything has a price. This is 'Merica. You can buy elections here. You want it, I'll sell it to you. All I ask is that you wheel it gently...and then not so gently.
-
Buy it and give it a home.
-
The CJ will run. Just need to get around to getting a new battery and bleeding the brakes....then getting it inspected.
-

Trey, are your sure you aren't confusing me with Marcus...broke back mountain is his lifetime movie. LolNope, city employee driving around in a dodge ram with "FIRE MARSHAL" plastered on the tailgate.