
Installed Currie Anti-rock and touched up the front bumper.
Nice!!! I hope to see it out this year. ![]()

Installed Currie Anti-rock and touched up the front bumper.
Nice!!! I hope to see it out this year. ![]()
Under the heading it's always something. ... after installing the BL & mml, it didn't want to shift into 2nd, 6th, or reverse. Had to modify the shift boot a bit. Did a test drive, everything shifts fine now. EXCEPT now it wont go into 4l! And I've got two new codes! Well looks like I've got my Sunday planned! Also how hard is it to get rid of a tcase drop?
With the body lift and mml you probably wont need the t-case drop. I didnt anyway.... Just put a jack under the center skid undo the 3 bolts on each side and reinstall. Its much easier with an extra set of hands though.
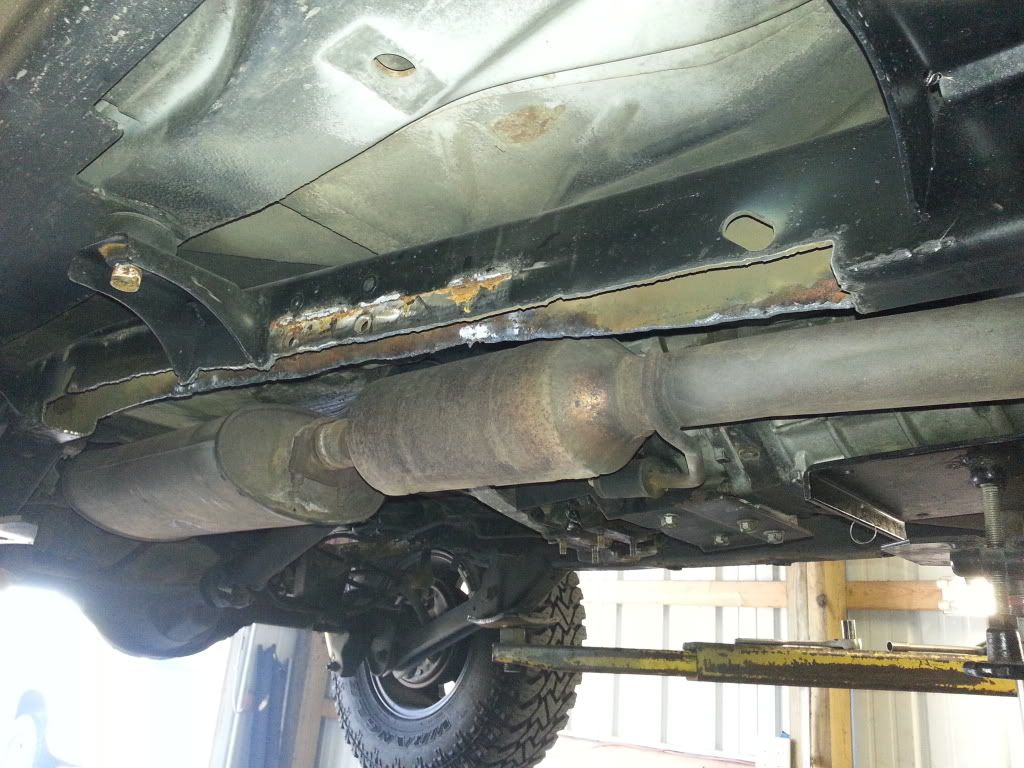
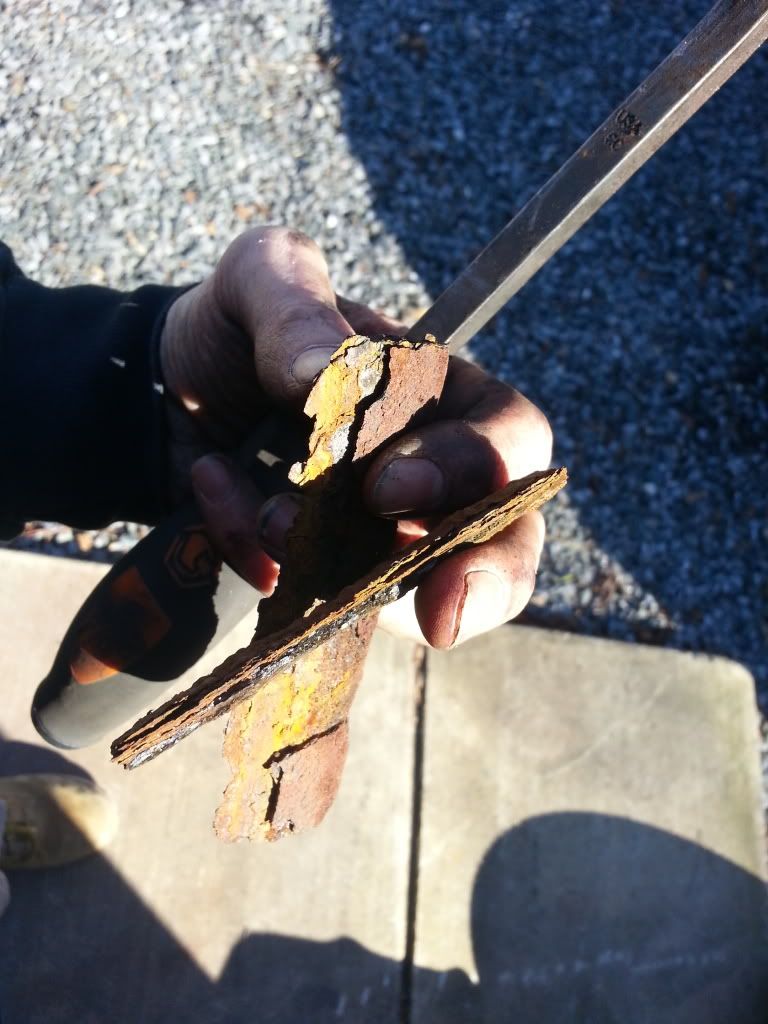
I repaited my frame repair with SafeTcap repair pieces
The Drivers frame rail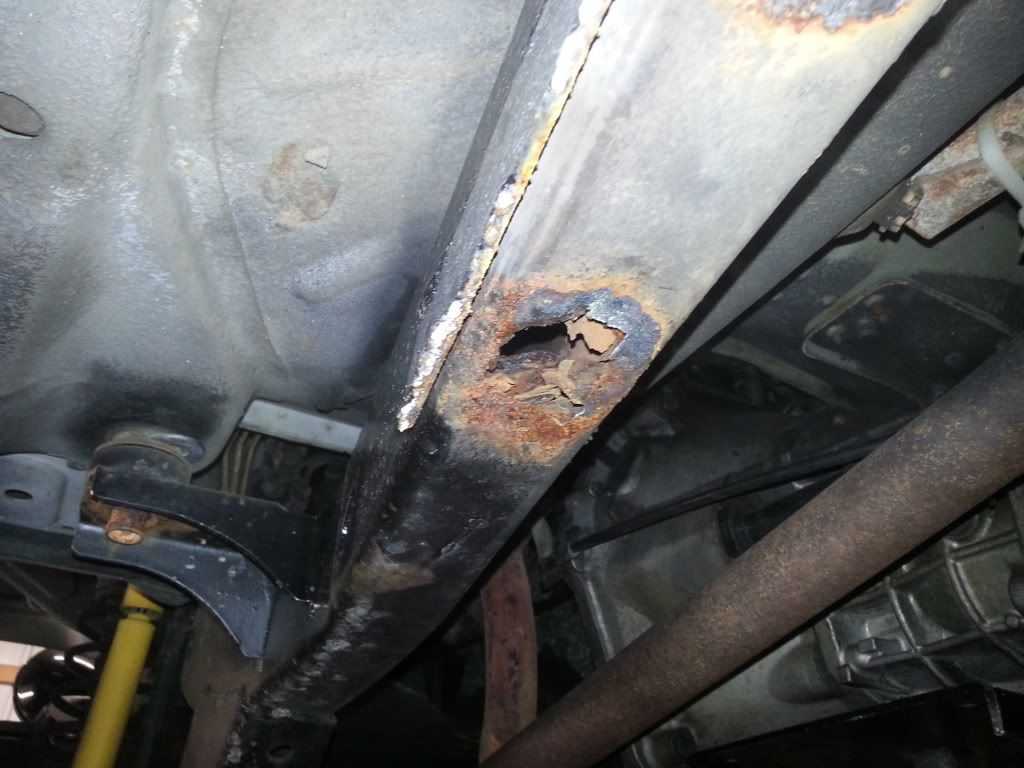
Plasma cutting the bottom 1'' of rust off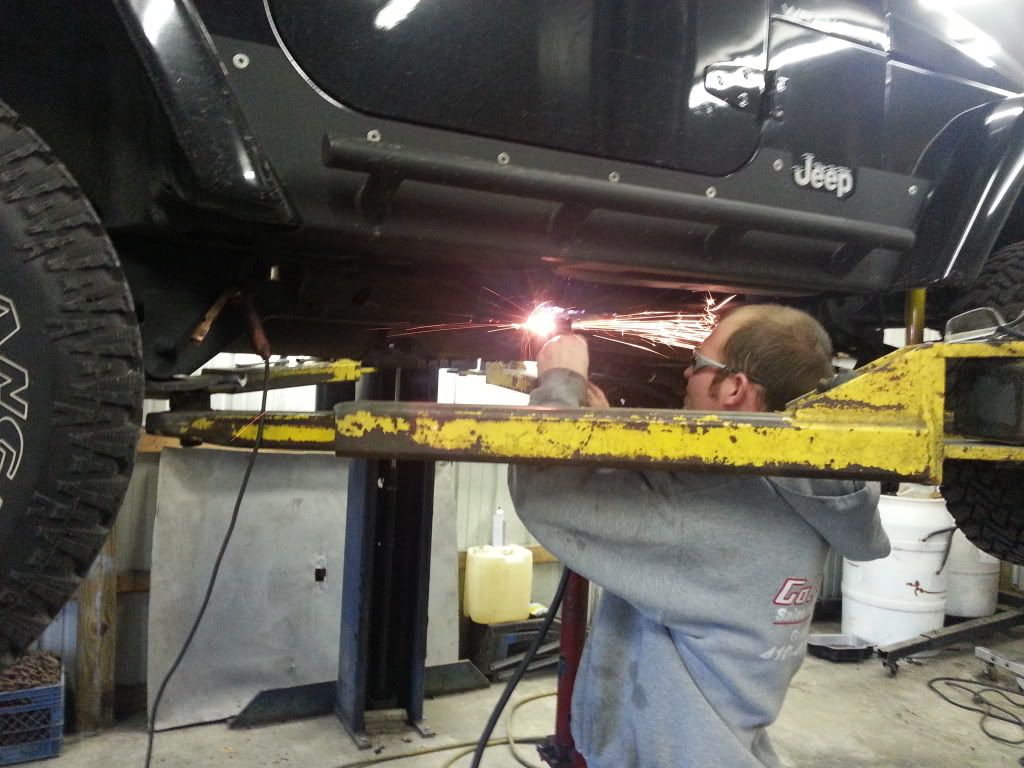
The rust inside the frame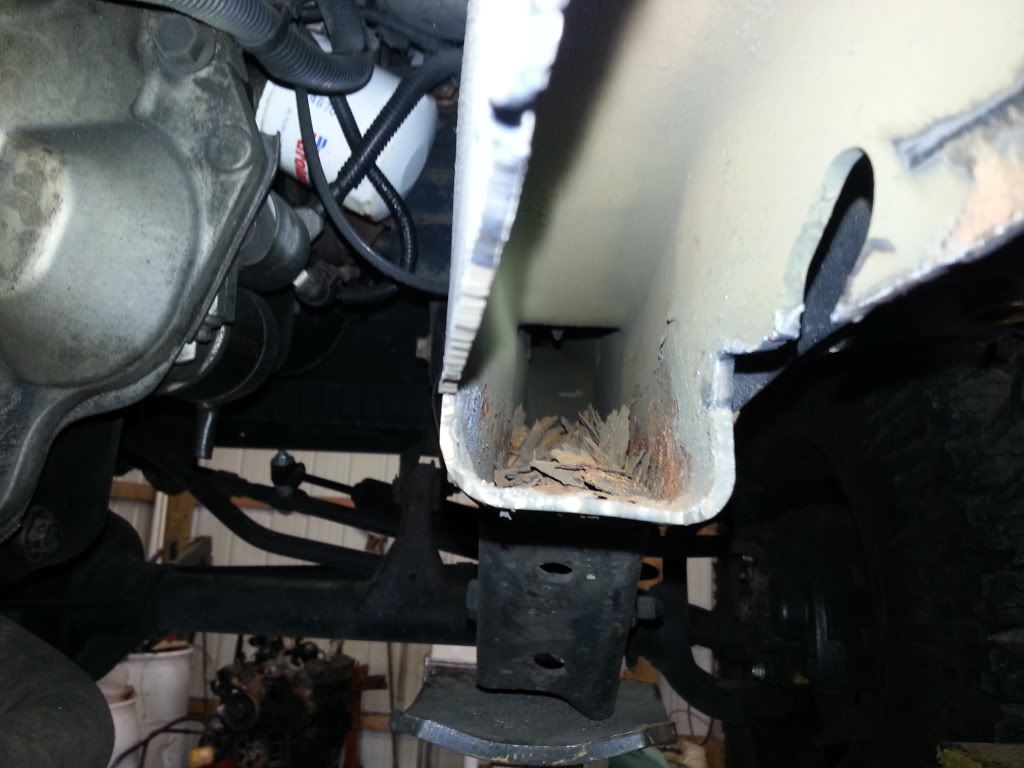
Test fit, had to do some light trimming to get it in the correct position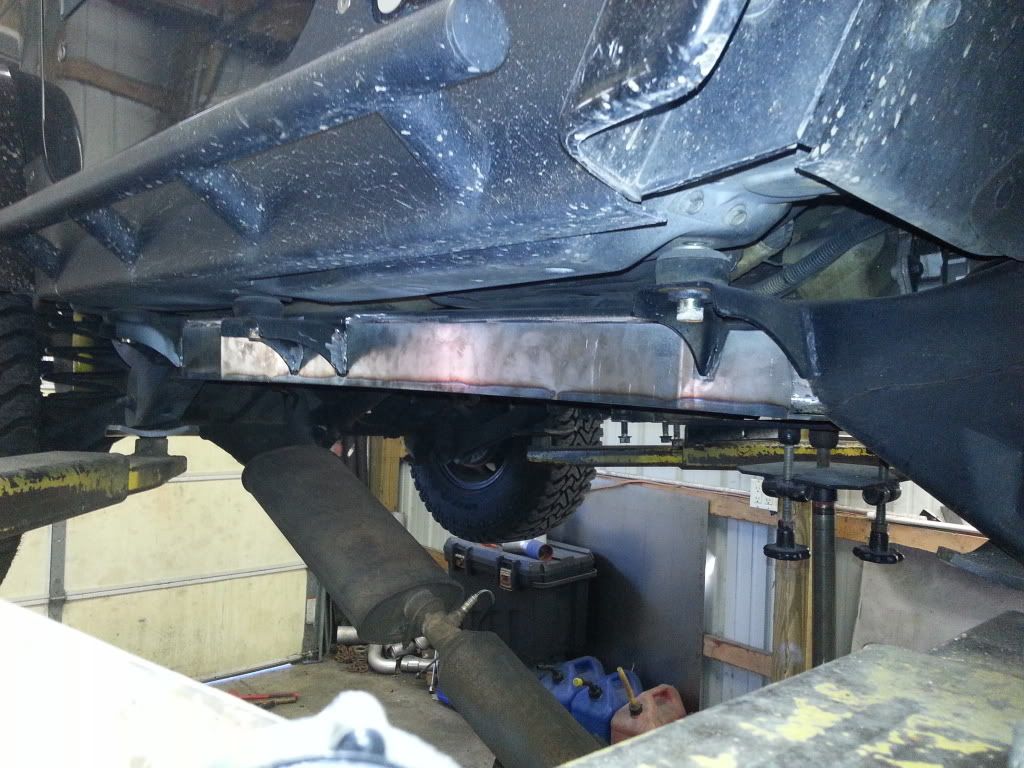
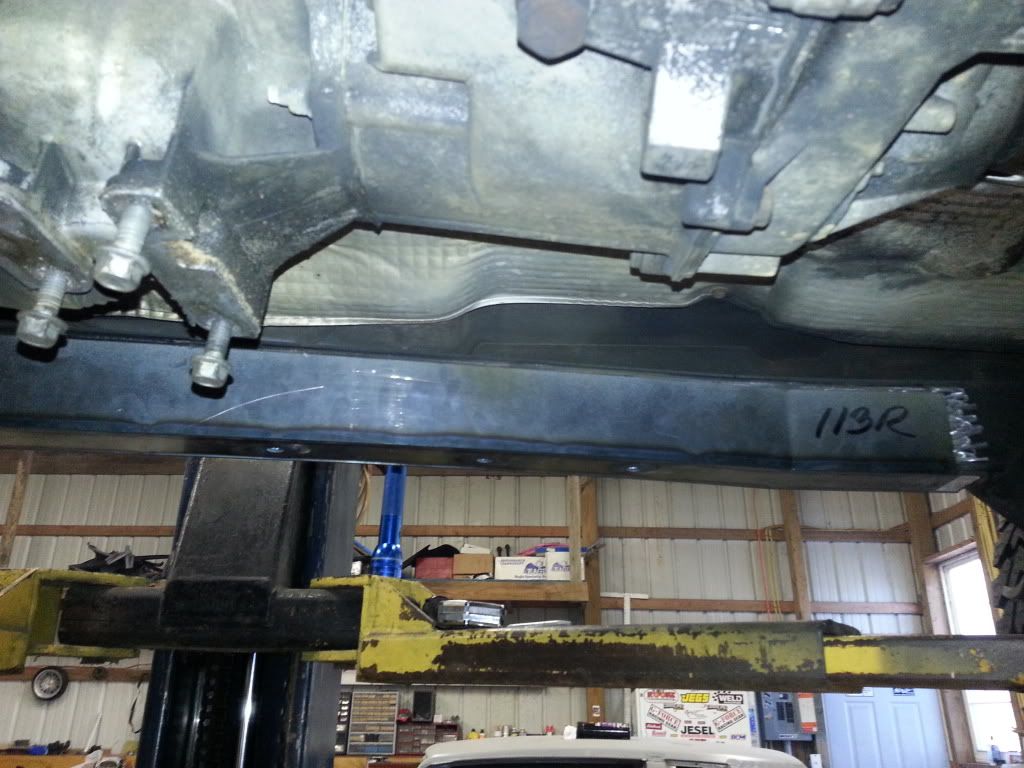
Burning it in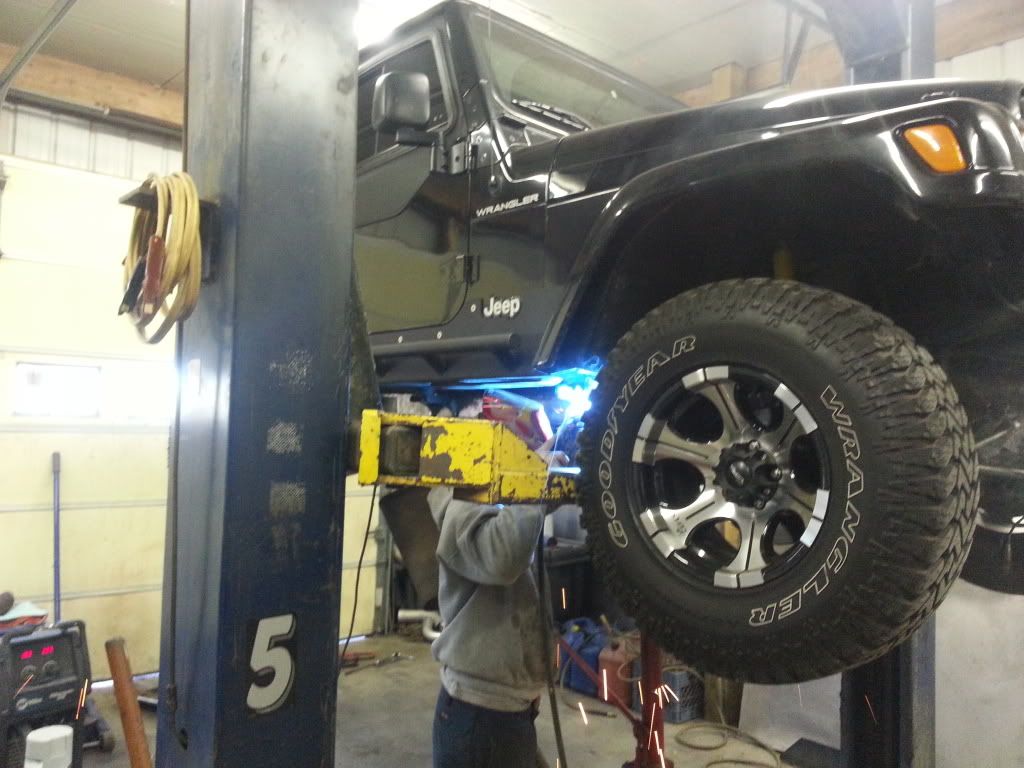
Cleaning up the welds before paint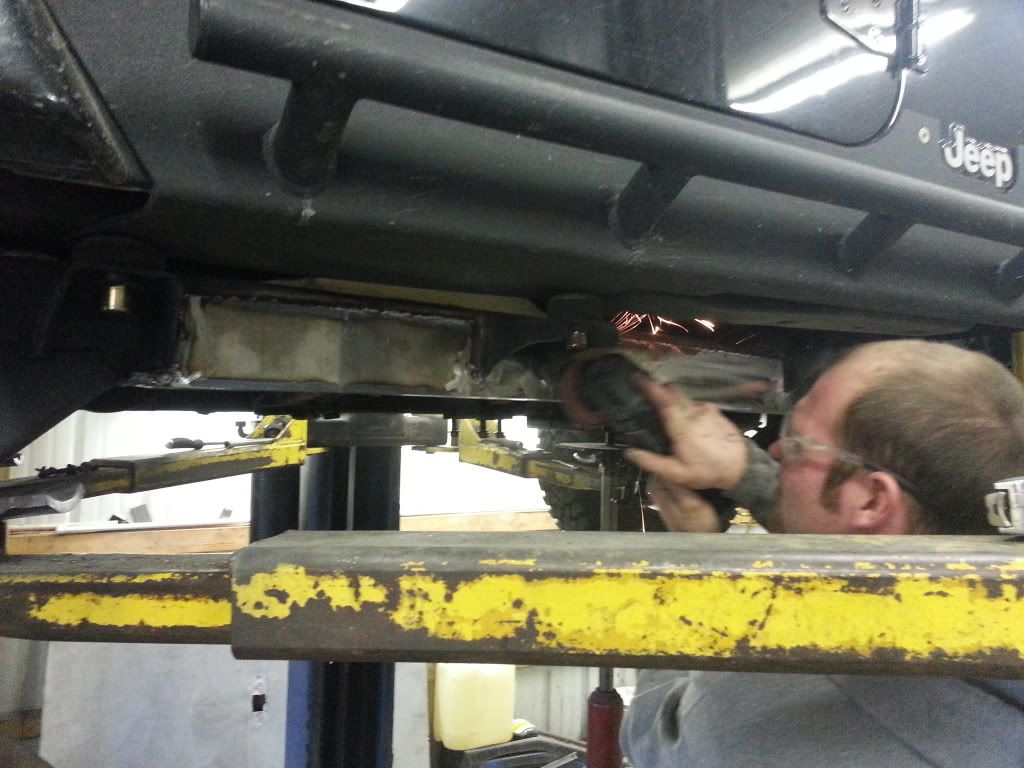
Painted and ready to hit the trails!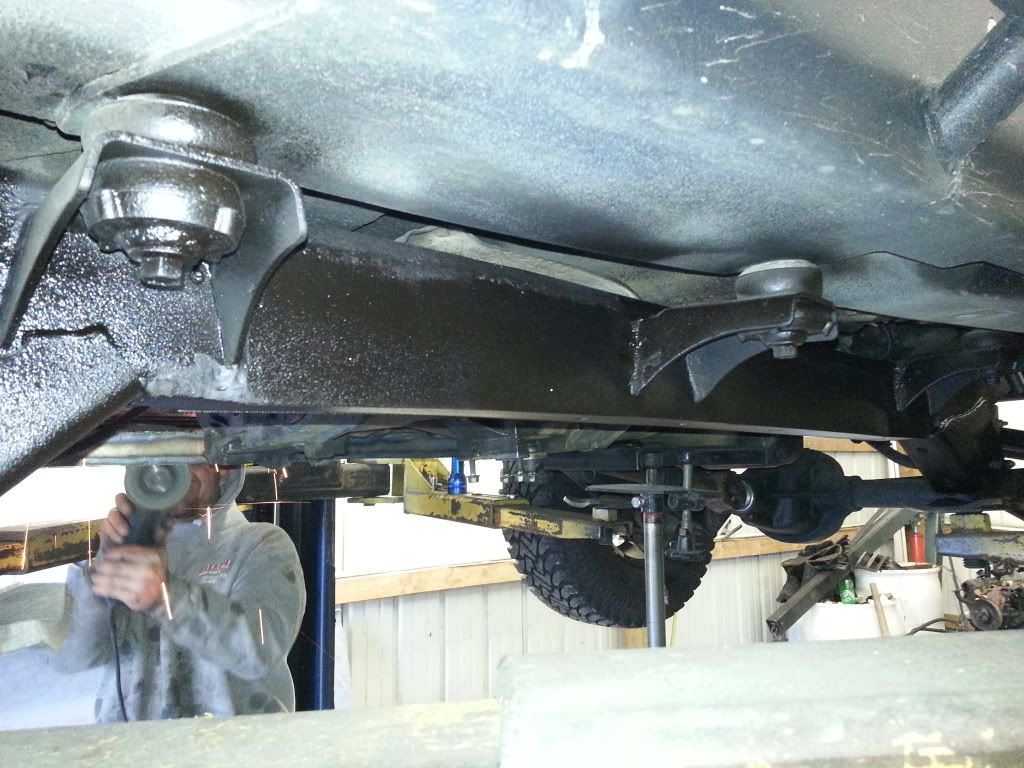
All in all It was an easy install, the driver side fit better than the passenger (no extra trimming). We did trim the inside of the driver rail down to reuse the factory holes for the fuel and brake line clips.
re-installed my spiderwebshade (you'd be surprised how much it helps control heat on a soft top) and a quick power spray...ready for some salty mess this week
Put together my fuel cell.

Then realized it won't fit where I want to put it. ![]()
 Display More
Put together my fuel cell.
Then realized it won't fit where I want to put it.

Well we all know you know how to cut to make it fit.

I repaited my frame repair with SafeTcap repair pieces
All in all It was an easy install, the driver side fit better than the passenger (no extra trimming). We did trim the inside of the driver rail down to reuse the factory holes for the fuel and brake line clips.
Did you drill / make hole in the bottom for drainage?
Did you drill / make hole in the bottom for drainage?
Not yet but I am going to drill one front and back
Got my full widths bolted up and 3 out 4 wheels on h1 double bead locks recentered to 5 on 5.5 with rock rings lots more to go


Are those press in centers? I was looking at them for mine but I really don't want mine any wider.
There would in
Got the Dana 300 done


 Display More
Got the Dana 300 done
What flip ring is that?
Its a clocking ring, jb conversions makes if
Its a clocking ring, jb conversions makes if
I thought the purpose of the DEO kit was to flip the T-case, thats why I put it in. If you flip it, a Std clocking ring won't line up without drilling out the tailhousing on the T-case (What I did). A flip ring allows you to clock it once it is upside down.
Yea ill have to drill it but with the clocking ring I needed a longer shaft for proper engagement
Yea ill have to drill it but with the clocking ring I needed a longer shaft for proper engagement
They make a sleeve to extend the seal on the back of the transmission to get that engagement.
Its a clocking ring, jb conversions makes if
When i bought my ring , I needed a 7/8" ring to adapt the AW4. Clocking was an added benefit.. Mine is steel, but was only $70 on ebay. The guy also had thinner rings. 3/8" for normal applications. What trans are you mating this to?
3/8...
http://www.ebay.com/itm/Dana-3…sh=item2c6be9c071&vxp=mtr
7/8 Flip
http://www.ebay.com/itm/Dana-3…sh=item2ec5a5a191&vxp=mtr
7/8 Non Flip ( the one I bought bot my CJ with AW4)
http://www.ebay.com/itm/Dana-3…sh=item2c6be9c07b&vxp=mtr
Well I'll find out next weekend when I install it
Don’t have an account yet? Register yourself now and be a part of our community!