
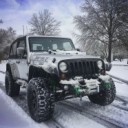
Started dyeing the new to me doors today. That's only 1 exterior coat!

Sent from my SM-G900T using Tapatalk

Started dyeing the new to me doors today. That's only 1 exterior coat!
Sent from my SM-G900T using Tapatalk
So 1 can does the exterior lowers, 1 interior lower and partial interior lower. Going to pick up 2 more cans later tonight and finish tomorrow.


Looks like that dye or whatever did a pretty good job.
Today I fed my jeep some money...in the form of a couple of magnaflow mufflers. The cheap turbo mufflers that were 1/3 of the price started rattling internally pretty bad. I fitted them up and tacked them in today, and I will hopefully finish welding them and get them back in tomorrow. I don't know how they will sound, but it should be better. The old ones sounded like a tractor at times. These are stainless, maybe they will last longer.
Chip Foose was on the box so they've got to be good.
Got the mufflers in and they sound good ![]()
Got the exterior of the uppers done but still need to do the interior sides of them.


Also brightened up a row of Chevy peeps @ work!
Sent from my SM-G900T using Tapatalk
On my brothers Cherokee (my old one), I rigged up a switch to engage the hidden factory "extended idle" function. It's currently got a stock strength alternator and can't keep up with the stereo system at idle.
For those curious, the 97+ XJs have the same basically ECU across the board. Pin 12 in the front-most ECU plug (all black plug) is an all-gray wire. Find that in the harness and rig up a switch or relay to connect the ECU side of the wire to ground. It'll hold the idle at 1000rpm in Park and Neutral.
That sounds like a pretty cool deal. I had to use a cable to do that on my antique carburetor thing.
Got a few things accomplished today...
12v accessory installed finally.. grand total of $6 and it even glows orange! ![]()


Actually washed the Jeep!
Finally got my new striker plates installed and the new latches. SO MUCH NICER and I don't have to worry about the doors popping open while I'm driving. [emoji19] 

Power washed the hard top inside and out.
Sent from my SM-G900T using Tapatalk
Ordered up all the parts to do the JK stock rear bumper pressurized water mod. Provided there are no glitches should have it up and running by Saturday on the sand. Eventually will get a different tank to use and mount somewhere since I don't want to use the stock rear bumper but this will work for now.
Ordered up all the parts to do the JK stock rear bumper pressurized water mod. Provided there are no glitches should have it up and running by Saturday on the sand. Eventually will get a different tank to use and mount somewhere since I don't want to use the stock rear bumper but this will work for now.
Suhweeeeeet!! You could find a way to run the outlet tube around the exhaust pipe and BAM! hot water!
Suhweeeeeet!! You could find a way to run the outlet tube around the exhaust pipe and BAM! hot water!
Should be warm enough from sitting in the bumper in the sun. But you're right in theory it wouldn't be all that difficult to make the water warm water. However typically the Jeep won't be running when using this.
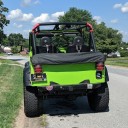
Started working on the pressurized water system last night. Busted the stock bumper out of the garage, cleaned it up, and drilled the hole in it for the line to the pump.

Spent entirely too long going back and forth about where to mount the spigot. Decided on the inside of trunk on the right hand side. Drilled a hole. The back side of the hole is inside of the taillight so it will be easy to access for installation as well as any maintenance.

Got the spigot mounted. 

Once the pump comes in today I will get it mounted and all of the lines run.
Also grabbed this coil hose for once it's all up and running. 
Do you need to add some RTV to the mounting bolts so you don't get any leaks? What pump are you using? You also may want to add a drain fitting to the bottom of the bumper so you can drain it in the winter.
I will be using plumbers tape on all the threaded junctions and most likely some sort of silicone seal or rtv on anything that's not threaded.
I got an RV water pump that is 12 v and has a pressure switch so it kicks on when the spigot opens.
The stock bumper has 4 drain holes on the bottom that I am plugging with stainless bolts that I will be able to remove to drain the bumper at the end of the season.
How much water will the bumper hold?
How much water will the bumper hold?
Everything I'm seeing online is saying around 7 gallons.
Since you are hooking up to a pump for pressure, if you plumbed it to the front of your Jeep you could hook up a heat exchanger to your heating core hoses. Then you'd have a good source for heating the water.
Since you are hooking up to a pump for pressure, if you plumbed it to the front of your Jeep you could hook up a heat exchanger to your heating core hoses. Then you'd have a good source for heating the water.
Not a bad plan. This isn't a final setup I don't think but I may consider adding heat at some point. My primary goal right now is to get it up and running before the beach on Saturday. ![]()
I will be using plumbers tape on all the threaded junctions and most likely some sort of silicone seal or rtv on anything that's not threaded.
I got an RV water pump that is 12 v and has a pressure switch so it kicks on when the spigot opens.
The stock bumper has 4 drain holes on the bottom that I am plugging with stainless bolts that I will be able to remove to drain the bumper at the end of the season.
Couldn't tell from the pics. How do you fill it?
Ok got it mostly done tonight.
Bottom drains plugged. (This didn't work correctly so they were dripping a little bit so I need to get bigger bolts and some silicone to seal them.

Fill mounted. I had spray it green and the paint got chewed up a little when I screwed it in, but in general this should work well. Attachment is for a standard garden hose. 
Didn't get a picture but I ran the power into the running lights. The pump works when pressure drops (i.e. When you open the spigot) but I wanted another means to turn it off in case something went wrong didn't want it to be able to drain the battery all the way down. So basically have to turn the running lights on for the pump to work. Didn't get a picture of the wiring.
And last but not least.
https://vimeo.com/172990879
Don’t have an account yet? Register yourself now and be a part of our community!