
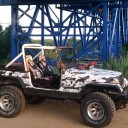
Ok... so as almost everyone here knows that, in no small part of driving through Wharton, my trans is shot and needs to be rebuilt. It's a TF999 3-speed automatic bolted up behind a 258 I6. Here's a little history on what I've done to get to this point.
Drained and removed transfer case
Drained transmission by dropping oil pan
Replaced trans filter
Filled with fresh fluid and flushed with new fluid (>6 gallons) until all traces of dirt and water were gone
Dropped oil pan and replaced filter again
Filled with fresh ATF while running and in nuetral
Shifted through all gears and topped off fluid
Transmission will only shift into 2nd by either manually shifting from low or @3500 rpms in Drive
Transmission will not shift into 3rd gear even up to 5K rpms
So the weekend before last I started disassembly in order to remove the trans and take it to Deltrans for a rebuild. So far, I've drained/removed the transfer case, removed driveshafts, drained trans and reinstalled oil pan, disconnected all electricals/vacuums, removed the homemade inspection cover, removed the send/return lines to the radiator, disconnected and removed the starter, disconnected the shift linkage and removed the transfer case shifter off of the trans housing.
My Hayne's manual is not very clear on the next steps. It tells me to remove the plate between the bell housing and the engine, then mark the torque conv in relation to the fly wheel so that it can be reinstalled correctly and then disco the flywheel from torque conv.... Well that plate won't come off until the trans does, I think and I'm not sure what my next step is here. Do the bolts on the outside edge of the bell housing hold the plate in place? If not, how do I get to the bolts that hold the torque conv and flywheel together? Is there anything else I'm missing on my to do list? TIA y'all!! ![]()
Transmission Help
-
-
They are refering to removing the inspection cover. Think bottom drivers side corner of that plate. They you can see and remove the torque converter bolts. The hardest part of the trans removal is getting the two External Torx (E14?) bolts at the top of the bell housing out.
-
Ok.. that makes much more sense. The inspection plate was missing... found out after I bought the Jeep from the PO, so I fabbed one up out of aluminum just to keep out dirt and road debris. I'll be making a new one while the trans is off. The manual also said that I would have to turn the wheel to access the bolts to the torque conv. and to only turn it in a clockwise rotation. Looks like I'll also be heading to HF to pick up an external Torx bit set. I'll try not to go to buck wild while I'm there.

I also planned on doing the breather tube mod for the trans since it'll be accessible. I need a tap & die set so I don't have to keep borrowing the one from work. I'll probably pick one up from there as well though I might look around for a better quality set since it'll be something I use fairly often. Thoughts? -
I need a tap & die set so I don't have to keep borrowing the one from work. I'll probably pick one up from there as well though I might look around for a better quality set since it'll be something I use fairly often. Thoughts?Sears. Craftsman warranty.
-
Sears. Craftsman warranty.
Doubt they will warranty cutting tools.
Taps and dies have an finite life.
-
Might want to pull the valvebody off and slit it and make sure the inside it clean. While you are at it, toss in a TF-2 Transgo kit and do a band adjustment (REMEMBER ITS INCH POUNDS no foot lbs).
Also might want to make sure the Throttle valve cable cable didn't get knocked out of wack in the mud.
I have 22 of ASTG manuals for various vehicle if you need specs you can't find it.
-
The manual also said that I would have to turn the wheel to access the bolts to the torque conv. and to only turn it in a clockwise rotation.
Turn the wheel? Turn the motor with a breaker bar on the crank pulley to access the torque converter bolts. Stupid Haynes manual. -
Yesterday, after work, I dove into getting the trans dismounted. I started with the flywheel-torque conv bolts. Almost made me throw up! Marked and removed the first bolt, got off my back, walked to front of the Jeep, layed down, turned crank pulley, got off my back, walked to drivers side, got under Jeep, removed 2nd bolt, repeated.... I'm glad there's only 4 bolts! I had to take a breather and a few sips of water. My stomach and head were swimming for a few mins.
 When I move into a house I don't care if it's 2 bedrooms and 1/2 a bathroom but IT WILL HAVE A GARAGE!!!!
Anyways, after that I loosened the two lowest side bolts on the bell housing. My brother showed up to help with the removal. I took the tray top from a work cart and strapped it to the trans with it all supported by the hyd jack. Then I located the bolts at the top of the bell housing through the tub floor opening. Shockingly two or three were missing!!! The two that were still there were seated pretty well but they came out with just a little bit of persuasion. All of them were hex head bolts as well so I guess I can return the ext torx bits I bought. I forgot to remove the one bolt holding the shift linkage in place so that was the last one out and we lowered the trans down with the hyd jack and slid it out from under the Jeep. Loaded it into the back of the Kia and plan on dropping it off at Deltrans after work. -
-
Okay... got a few questions I couldn't find the definitive answers to online.
Does anyone know what size the cooling lines are? I believe that they're 5/16" from a few things I've read but not 100% sure.
How hard is it to bend a new line or 2? I tore the return line at the the trans and have been looking for a way to repair it. They guy at Deltrans gave me a few sites to look for pre-bent replacement lines but they're upwards of $80. He also said that he could splice in a new 6" section to replace the torn part but he didn't quote me a price on it. That would also be on the condition that the line was still in good shape and usable. I'm thinking that if I could bend 2 new lines I could just follow the shape of the OEM lines I still have. Thoughts... pros/cons...? Anyone willing to teach me bending?? -
I have done a little bit of tube bending and seen it done allot during my AF career on the aircraft i have worked. For all the stuff you would need to get so that you can do it your self it might be cheaper just to buy a pre-made one. You would need a tube bender, a flare kit, then tubing and associated hardware. You can get the tube bender for as cheap as about 20 bucks, the flare kit for about 20 bucks also. I am guessing its a small diameter tube that you need to make? Those are not that hard to do compared to heavier tubing. Just make sure you get the right kind of tube for what you need it to do. Not to sure about having the bad section replaced on the line you already have, not sure what method the guy would use to do it. The only way i know is by swedging the new to the old and if its a small line not sure if that would work, only seen it don't on 1 inch diameter stainless steel lines made to hold about 3k psi. Maybe some one else on the board has had this done and can give more info about it. Hope this helps some. Sure you can find videos on youtube that show you how to do this.
Mike
-
Picked up the bellhousing from Deltrans after work. Going to do the vent relocation mod. I'll probably paint the bellhousing while I have it. If I do, should I use a high heat paint or some type of enamel? It don't have to be pretty, more for corrosion resistance and shedding dirt/oil and cleaning ease.
-
...more for corrosion resistance and shedding dirt/oil and cleaning ease.I thought the bell housing was aluminum? Been awhile since I was under looking at an automatic.
-

I thought the bell housing was aluminum? Been awhile since I was under looking at an automatic.
It is... Guess corrosion a not a huge concern.

-
Your trans should be a one piece case. There is no seperate bh and it is all alluminum. Btw the new vent has to go into the case behind the pump assembly. It would be best if you brought the pics into deltrans and have them do it.
-

Your trans should be a one piece case. There is no seperate bh and it is all alluminum. Btw the new vent has to go into the case behind the pump assembly. It would be best if you brought the pics into deltrans and have them do it.
It is all one piece except for the very rear end of it where it attaches to the transfer case. BH was just the term I was using as practice for my typing skills.
Bill and I talked about the vent relo mod Friday when I dropped it off. I showed him the write up by MeanMax and the photos off of JF. When I picked it up yesterday we discussed it more in depth and the location of the vent. We're both good on the location of placing the vent which will be about 1" behind the pump and offset slightly to the passenger side of the case seam so as to prevent any stress cracks forming along the seam. The threaded end of the elbow will be flush with the inside of the housing so as not to interfere with any moving parts inside. His tech is going to seal up the original vent hole with a threaded plug and a good dose of loctite. I'll try and remember to take pics as I go along. -
Thats how mine is done. It should be simple for them to do while its apart. You dont want to do it while its together because the shavings will get inside the trans.
-
Did you get any sort of shift improver??
-Brad
-

Did you get any sort of shift improver??-Brad
Me or jeremy? Mine has a new full reverse vb, rebuil tc with redesigned tc hub and a new matched pump. Also got a new billet first gear planitary. After breaking the tc hub in moab i didnt want it to go bad again so i upgraded. A boat load money later i should have stronger trans but knowing me i can break anything :). I did take it for a test drive the other night and it does shift much smoother the the artcarr shift kit i had before.
Aaron
-
Deltrans sealed mine (32RH) and ran vent tubes when I had them rebuild it. I did the same thing, showed them a write up from Jeepforum. They recommended moving it to a slightly different location, its been ~4 years with no problems.

Participate now!
Don’t have an account yet? Register yourself now and be a part of our community!