

What have you done to your Jeep today?
-
-
is the opening height high enough for a lifted jeep?
-
is the opening height high enough for a lifted jeep?
Probably but it also probably doesn't have a snow load. Tractor supply also sells the shelter logic brand.
Sent from my HTC6525LVW using Tapatalk
-
I used these to store my boat for many years! I would get about two years out of it more or less. If you knock the snow off as it snows it handles it fine. My last one collapsed catastrophically after a small snowfall when I was not home.
-
I just got my fuel injection really dialed in so it was time to correct some other issues. The jeep has been smoking a lot and consuming oil. I have never been into this engine. I bought the whole thing as a basket case and this engine would turn over so I just decided to run it as it was. Recently I've been getting crud in the antifreeze and the coolant recovery tank has been acting up. It actually overflowed one time, and then all the antifreeze was gone the next time. I decided it needed a set of head gaskets at least, and a valve job with oil seals also.
I had a spare set of heads here from the original basket case, so I disassembled them to prep for rebuilding. I used a carbide burr to clean up the valve bowls and blend and smooth the rough cast runners into the valve seats. The factory casting is rough and so is the machining, so a little bit of work here can considerably help the flow.
I then took the heads to Aldermans Machine Shop to have the valve work done. I've worked with Paul and John there on several occasions and they do very good work.
I got the heads back yesterday and here they are.

"Since I'm already in there," I'm changing out the stock two barrel manifold to something that will breath a little better.

-
Nice. I guess you'll have to redial the fuel injection now since the flow will be so much better.
Might as well put a set of rings and bearings on while you have it apart
Sent from my SCH-I545 using Tapatalk
-
I'm hoping the injection will tune itself. The major problem with tbi on an odd-fire is the tach signal is erratic so the computer can't determine the proper rpms, and therefore can't accurately meter fuel. I solved that by using an even-fire pertronix ignitor in my distributor beside the original points. The points still trigger the ignition, but the tach signal comes from the Pertronix setup. The tbi really likes it!
Rings and bearings are a whole other story. I was going to build an entirely different block and these heads and put it all together and then change it out one weekend. That was going to be much later. When the head gaskets started leaking, possibly from the new found power, I needed to do something. I have a 383 and turbo 400 that are rebuilt and supposedly ready to go, but that's too long to fit in front of the rear. I did really want them in there.
And there's the weak, whiny T-90 transmission and matching loud Dana-18 transfer case. I'm looking to replace them with a T-18 and a Dana 20 in the future, but no right now.
When I put this engine in I did look at the cylinders from the pan side and they looked ok. There was mud in a couple of exhaust ports and rust in the intake but I figured I would just run it till it blows, so in it went.
I finally decided to do the whole thing and took my spare block to be worked on, and it was discovered to be cracked. I then pulled the heads that were leaking to start the process. To my surprise the cylinders look really good, better than just about anything I've pulled heads off of. I had also replaced the rear main seal when the pan was off, so at that time I had seen the bearings and they looked pretty good then.
So with all that info I decided to just redo these heads and replace them. The original valves had no seals and they were very worn in the guides, and they showed it by the oil in the valve bowls. You could wiggle the valvaes back and forth in place with the springs intact. Aldermans fitted them with viton seals and cut them to clear a cam with up to .435 lift for future upgrades. The stock cam looks pretty good, so I'm sticking with it for now.
I will probably find another block to build the bottom end from, but this will get me mobile faster, and that's part of the equation.
I do think I will rebuild a Dana 20 that I have and have it ready to replace the Dana 18, but that can wait also. The Dana 20 low range isn't as low as the dana 18, so I'd like to wait until I get a T-18 with granny low. That will bring my lowest crawl down even lower than now.
It's just never simple! -
I'm running a t18/Dana 18 set up. The Dana 18 is winey but you get used to it. There is a modification for the Dana 20 using gears from a Bronco Dana 20 which will get the low range down.
Sent from my SCH-I545 using Tapatalk
-
Little things today... led to a discovery...
1. Put together a dedicated tool kit for the Jeep using a tool bag and some new wrenches I got good holiday deals on. Nothing special, just solid tools in case of Roadside repair work. Nice thing is that the tool bag is small enough to perfectly fit in my center console (nice and lockable).
2. New lug nuts, external splined.. now need center caps
3. Organized recovery gear, tie downs and rear Tuffy boxes
4. Changed 2 squealing belts (drive belt for AC missing a few teeth) and found that the lower bolt to the AC compressor was missing allowing the compressor to move. Upon closer inspection it appears that the bracket has a piece broken off of it. I jammed a 3/8 bolt in but didn't have one long enough to set a nut on the end. Tomorrow I'll grab a 5/16x3" and use a steel sleeve cut to length to button it all back together.
5. Rear seat back in -
dont over tighten those lug nuts. Sometime they snap in half at the base of the spline when removing. Then u have to torch out the remainder of the lug and stud to get the wheel off.
-
I finished tuning the fuel injection and it now runs great with no codes.

-
I also took apart my transfer case to check the gears, you can never be too sure.

They looked ok, so I guess I'll put it back together. -
I started with replacing the rear lower control arm bushings. Pass side first, no problems. Removed bolts and control arm basically fell out without hesitation. Removed old bushings, cleaned, greased and in with new poly bushings, reinstalled. Started to duplicate on the driver's side and made it as far as removing the nuts. There was some tension on the bolts holding them in. After some persuasion I was able to get them out. When I did, I noticed the rear moved on me about a half inch. Again repeated the process of reinstalling them and decided to get a jack and a block and lifted the front shaft of the rear only. Once I achieved the correct angle, the bolts slid in without any force. Job complete for the lowers. Next will be the uppers.
I also finally installed jks discos on the front. -
Considering this was my first time, I am not too sure about the movement of the rear when I removed the driver's side lower control arm. Is that normal? I didn't get any movement on the pass side at all. I did have the Jeep in the air about 6" on stands under the rear.
-
I had a shift in the rear when accelerating and decelerating... Hence bushing replacement.
-
Found a short in my headlight switch so replaced that. Found there are two switches offered for the CJ so if you have to replace yours make sure you get the right one. Also finally mounted my rear side lights (yes I'm due for inspection) and got my horn working
Sent from my SCH-I545 using Tapatalk
-
Just a little follow up... all of the tools laid out fit into this tool bag with room for more. From the blue zip ties down and from the socket set to the ratcheting wrenches on the right... It's a 10" Husky brand tool bag from Lowes. I picked up 2 of them for $4/ea. The Husky pass thru socket set was ~$20 and has both SAE/Metric as well as a 3" extension and bit driver.
The big 24" tool box was $9.88 @ HD and holds a ton of gear. 8 ratchet straps, 3 D-rings, 30' tow strap and a set of 18' jumpers... still plenty of room for more gear. I picked it up this morning and they still had a bunch left. It's also the perfect size to fit behind the rear seat of a YJ.
Gotta love Christmas Special leftovers!
-
yes its normal. Sometimes the jeep will stay and sometimes it wont. Kind of depends on how tight the other joints r.

Considering this was my first time, I am not too sure about the movement of the rear when I removed the driver's side lower control arm. Is that normal? I didn't get any movement on the pass side at all. I did have the Jeep in the air about 6" on stands under the rear.
-
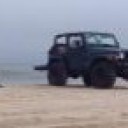
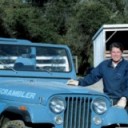
Mostly finished stripping Neil's renegade. I'm still planning to pull the rest of the flares.


Sent from my HTC6525LVW using Tapatalk
-
 Display More
Mostly finished stripping Neil's renegade. I'm still planning to pull the rest of the flares.
Sent from my HTC6525LVW using Tapatalk
Shoulda done a gopro timelapse of the demolition, that would have been cool. Now all you need is about 500lbs of thermite to make the tub disappear.

Participate now!
Don’t have an account yet? Register yourself now and be a part of our community!